


Installing plastering gypsum over existing plaster can be a practical solution for renovating and enhancing the interior walls of a building. As a supplier of high - quality Plastering Gypsum, I've had the opportunity to witness firsthand the benefits and challenges associated with this process. In this blog, I'll guide you through the steps of installing plastering gypsum over existing plaster, sharing valuable insights and tips along the way.
Assessing the Existing Plaster
Before you start the installation process, it's crucial to assess the condition of the existing plaster. Check for any signs of damage, such as cracks, holes, or loose areas. Minor cracks can often be repaired, but extensive damage may require more significant preparation or even the removal of the old plaster.
If the existing plaster is in good condition, it can serve as an excellent base for the new plastering gypsum. However, if there are any areas that are loose or detached, they should be removed and the surface should be properly prepared to ensure a strong bond with the new plaster. You can use a putty knife or a scraper to gently test the adhesion of the existing plaster. If it flakes or comes off easily, it needs to be addressed.
Surface Preparation
Once you've assessed the existing plaster, the next step is surface preparation. This is a critical stage that can significantly impact the success of the plastering process.
First, clean the surface thoroughly to remove any dirt, dust, grease, or loose particles. You can use a stiff - bristled brush or a vacuum cleaner to clean the wall. For stubborn stains or grease, a mild detergent solution can be used, followed by rinsing and allowing the wall to dry completely.
If the existing plaster has a glossy finish, it may need to be sanded to create a rough surface for better adhesion. Use medium - grit sandpaper to gently sand the wall, then wipe away the dust with a clean, dry cloth.
In some cases, it may be necessary to apply a bonding agent to the existing plaster. A bonding agent helps to create a strong bond between the old plaster and the new plastering gypsum. Follow the manufacturer's instructions when applying the bonding agent, and allow it to dry according to the recommended time.
Mixing the Plastering Gypsum
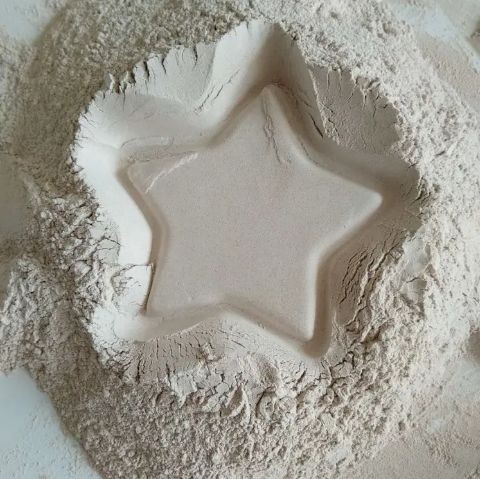
As a supplier of Plastering Gypsum Powder, I know that proper mixing is key to achieving a high - quality finish. Start by reading the manufacturer's instructions on the packaging of the plastering gypsum powder. Different products may have different mixing ratios and requirements.
Typically, you'll need a clean mixing container and a mixing tool, such as a paddle mixer attached to a drill. Measure the appropriate amount of water into the container first, then gradually add the plastering gypsum powder while stirring continuously. Stir until you achieve a smooth, lump - free consistency. Avoid over - mixing or under - mixing, as this can affect the performance of the plaster.
The mixing time and the consistency of the plaster can vary depending on the application. For example, if you're applying a thin coat, you may want a slightly thinner mixture, while a thicker coat may require a more viscous consistency.
Applying the Plastering Gypsum
Once the plastering gypsum is properly mixed, it's time to start applying it to the existing plaster. You can use a trowel or a plastering hawk to apply the plaster.
Begin by applying a scratch coat, which is the first layer of plaster. The scratch coat is usually about 6 - 10mm thick. Use a trowel to spread the plaster evenly over the wall, starting from the bottom and working your way up. Make sure to apply the plaster in a smooth, continuous motion, and use the trowel to create a rough surface by scratching it with a nail or a special scratching tool. This rough surface will help the next layer of plaster to adhere better.
Allow the scratch coat to dry partially. The drying time can vary depending on factors such as temperature, humidity, and the thickness of the coat. Generally, it may take a few hours to a day.

After the scratch coat has dried to the appropriate level, apply a brown coat. The brown coat is thinner than the scratch coat, usually about 3 - 5mm thick. Again, use a trowel to spread the plaster evenly over the scratch coat, and smooth it out as much as possible.
Finally, apply a finish coat. The finish coat is the thinnest layer, typically about 1 - 2mm thick. It provides a smooth, aesthetically pleasing surface. Use a fine - trowel to apply the finish coat, and work it in small sections to ensure a uniform finish.
Finishing and Curing
After applying the finish coat, you can use a float or a sponge to smooth the surface further and remove any ridges or imperfections. You can also create different textures on the surface if desired, such as a smooth, matte, or textured finish.
Once the plastering is complete, it's important to allow the plaster to cure properly. Curing is the process by which the plaster hardens and gains strength. Keep the room well - ventilated during the curing process to allow moisture to escape. Avoid exposing the freshly plastered wall to direct sunlight or extreme temperature changes, as this can cause cracking or uneven drying.
The curing time can vary depending on the type of plastering gypsum used, the thickness of the plaster, and the environmental conditions. Generally, it can take several days to a week for the plaster to fully cure.
Troubleshooting
During the installation process, you may encounter some common problems. For example, if the plaster cracks during the drying or curing process, it could be due to several factors, such as improper mixing, rapid drying, or insufficient surface preparation. To prevent cracking, make sure to follow the mixing instructions carefully, control the drying environment, and prepare the surface properly.
If the plaster doesn't adhere well to the existing plaster, it may be because the surface was not clean or rough enough, or the bonding agent was not applied correctly. In this case, you may need to remove the non - adhering plaster, re - prepare the surface, and re - apply the plaster.
Advantages of Using Plastering Gypsum
Plastering gypsum offers several advantages over other materials, such as Ordinary Portland Cement. It has a shorter setting time, which means that the plastering process can be completed more quickly. It also has good fire - resistance properties, making it a safer choice for interior walls. Additionally, plastering gypsum is more environmentally friendly, as it consumes less energy during production compared to cement - based materials.
Conclusion
Installing plastering gypsum over existing plaster is a viable option for renovating and improving the appearance of interior walls. By following the steps of surface assessment, preparation, mixing, application, finishing, and curing, you can achieve a high - quality plaster finish. As a supplier of Plastering Gypsum, I'm committed to providing high - quality products and sharing my expertise to help you with your plastering projects.
If you're interested in purchasing our plastering gypsum products or have any questions about the installation process, feel free to get in touch with us. We're here to assist you with your project and ensure its success.
References
- "Plastering Handbook" by a well - known plastering industry expert.
- Manufacturer's instructions for Plastering Gypsum Powder and related products.


